Hawker Sea Fury
Monday, 29 January 2024 15:33On Friday I finished up my Airfix 1/48 scale Hawker Sea Fury FB.11 model kit. The Sea Fury was perhaps the pinnacle of piston-engined fighter aircraft, and was used as a fighter-bomber by the Royal Navy during the Korean War. This particular aircraft was flown off the Royal Navy carrier HMS Glory in 1950.
Here's a link to the album if you want to see a start to finish of this and my other model, the Wyvern.
The Airfix kit was amazing. Perfect fit, the instructions were a work of art, and generally good design.
For the paints, I used Mr Color lacquers for all the airbrushing (the main colours are Dark Sea Grey and Sky, with a black finishing primer and mottled Deck Tan to give the surfaces a slightly uneven look). Brush painting was done with Humbrol enamels; that's mostly things like the seatbelts, instruments and dials, wheels, and little touch-ups. The Mr Color lacquer paints go on beautifully, dry very quickly (I can do four coats in the same airbrushing session), and are extremely durable; they don't leave marks when masking tape is used. Once everything is mostly assembled and painted, I use a Mr Color gloss clearcoat and apply decals, using decal softening solution which gets the decals to shape around panel lines properly. Then more clear coat, and then I do weathering; that's stuff like the panel lines (which I do with a black enamel panel line paint), exhaust and gun marks (I use Tamiya weathering powder, which is like eye shadow) after studying pics of the real aircraft to see when the exhaust leaves soot. After than, I use a clear matt coat which finishes it all off.
Here are some pics of this Bristol Centaurus-powered beast.


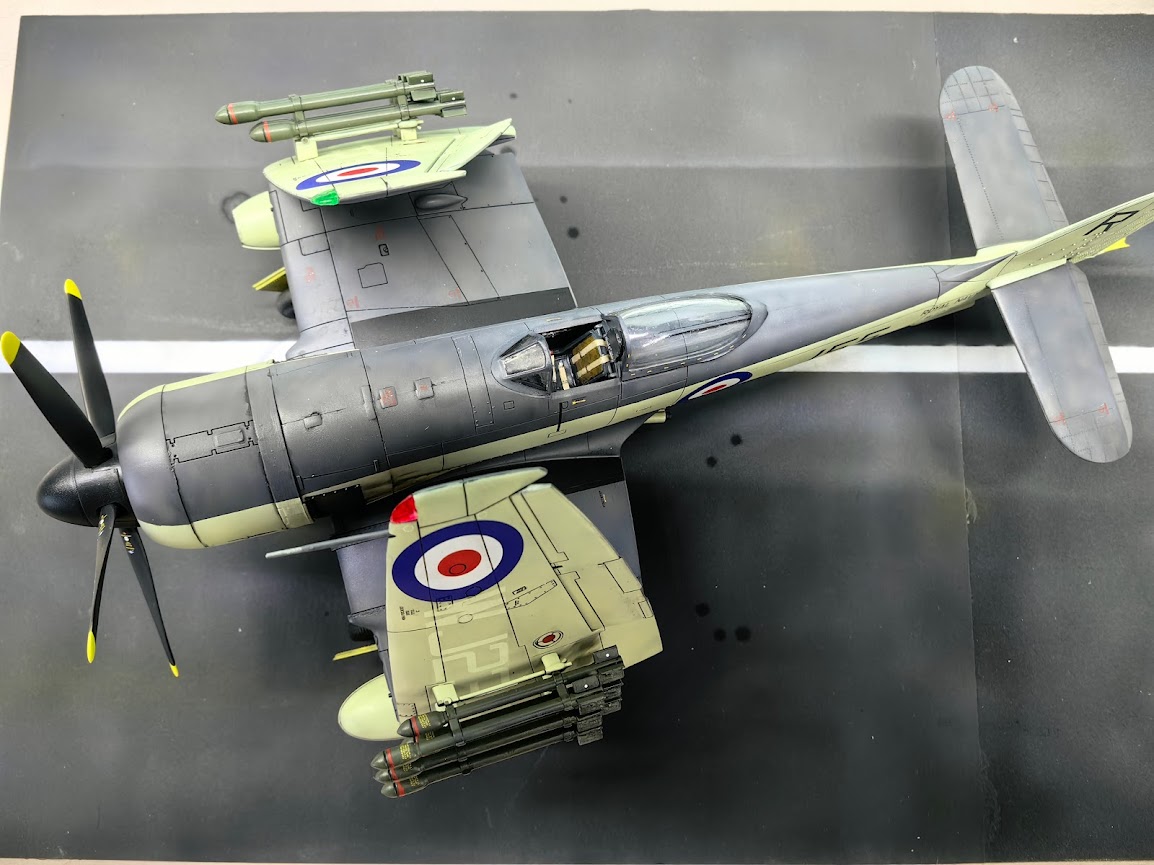
Here you can see the rockets on the wings. Each of these 12 rockets has 6 decals on it, with a total of 72 decals on the rockets alone. One is a red strip which needs to be wrapped around neatly, and four are little white dots 1mm in size. I spent hours on the decals. If you're interested, on the underside of the wing you're looking at, including the rocket decals, there are 44 decals: two faint light circles, then the British roundel, then some text on the left, two tiny bits of text above the "W", the WJ2 marking, the red dot in the circle, and the 36 decals on the rockets.

While I was building these models, I also made some flight decks. I bought a couple of cheap picture frames, and glued two different grades of fine sandpaper to the hardwood backing in the frame. I airbrushed it with black and grey, used some brownish weathering powder, airbrushed a white runway marking, and used dilute black paint to make oil stains. Came out quite well, I think.
Here are my last three kits on my picture-frame flight decks: the Seafire, Sea Fury, and the Wyvern.

Here's a link to the album if you want to see a start to finish of this and my other model, the Wyvern.
The Airfix kit was amazing. Perfect fit, the instructions were a work of art, and generally good design.
For the paints, I used Mr Color lacquers for all the airbrushing (the main colours are Dark Sea Grey and Sky, with a black finishing primer and mottled Deck Tan to give the surfaces a slightly uneven look). Brush painting was done with Humbrol enamels; that's mostly things like the seatbelts, instruments and dials, wheels, and little touch-ups. The Mr Color lacquer paints go on beautifully, dry very quickly (I can do four coats in the same airbrushing session), and are extremely durable; they don't leave marks when masking tape is used. Once everything is mostly assembled and painted, I use a Mr Color gloss clearcoat and apply decals, using decal softening solution which gets the decals to shape around panel lines properly. Then more clear coat, and then I do weathering; that's stuff like the panel lines (which I do with a black enamel panel line paint), exhaust and gun marks (I use Tamiya weathering powder, which is like eye shadow) after studying pics of the real aircraft to see when the exhaust leaves soot. After than, I use a clear matt coat which finishes it all off.
Here are some pics of this Bristol Centaurus-powered beast.
Here you can see the rockets on the wings. Each of these 12 rockets has 6 decals on it, with a total of 72 decals on the rockets alone. One is a red strip which needs to be wrapped around neatly, and four are little white dots 1mm in size. I spent hours on the decals. If you're interested, on the underside of the wing you're looking at, including the rocket decals, there are 44 decals: two faint light circles, then the British roundel, then some text on the left, two tiny bits of text above the "W", the WJ2 marking, the red dot in the circle, and the 36 decals on the rockets.
While I was building these models, I also made some flight decks. I bought a couple of cheap picture frames, and glued two different grades of fine sandpaper to the hardwood backing in the frame. I airbrushed it with black and grey, used some brownish weathering powder, airbrushed a white runway marking, and used dilute black paint to make oil stains. Came out quite well, I think.
Here are my last three kits on my picture-frame flight decks: the Seafire, Sea Fury, and the Wyvern.


